In this blog, I will talk about the Integration of Playwright with Jenkins. Jenkins is a self-contained, open-source automation server that can be used to automate all sorts of tasks related to building, testing, and delivering or deploying software.
Moreover, the main agenda of the blog is to integrate Jenkins with the playwright.
This blog covered the following
- Installing playwright
- Create playwright test cases
- Installing Jenkins
- Create package.json to run the test case in Jenkin
- Set up Build in Jenkin to run the test case
Step 1: Playwright Installation
Create a new folder, In my case, I will call it playwright_With_JavaScripts
Step to Install Playwright
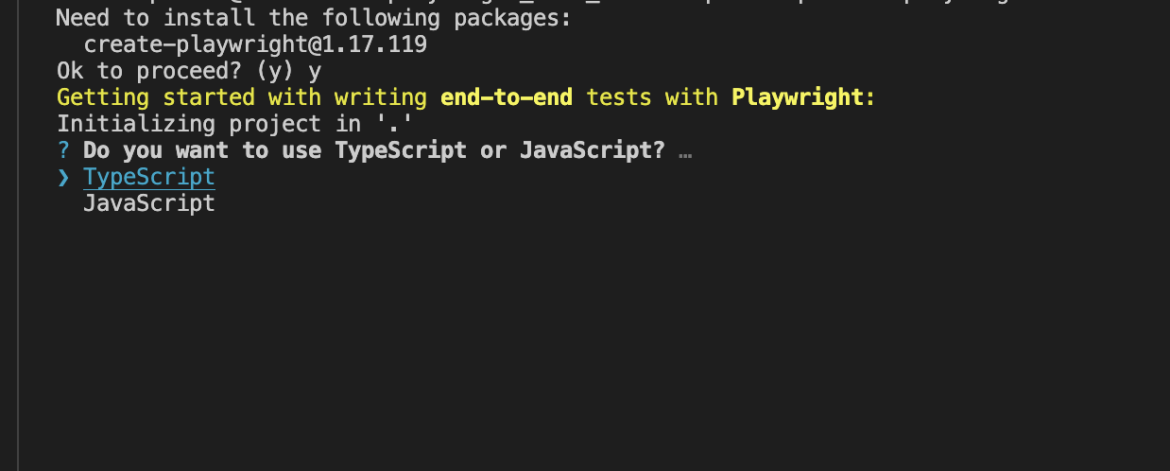
- To install playwright, in the project folder i.e playwright_With_JavaScripts:> run npm init playwright.
- In the terminal below option display either select TypeScript Or JavaScript (In our case I am selecting JavaScript)

Once Installation is done we can see in package.json playwright dependency is added

Some of the Commands in Playwright
- npx playwright test
Runs the end-to-end tests. - npx playwright test — project=chromium
Runs the tests only on Desktop Chrome. - npx playwright test example
Runs the tests in a specific file. - npx playwright test — debug
Runs the tests in debug mode. - npx playwright codegen
Auto generate tests with Codegen.
Step 2: Test Case for Automation
Let’s take a very simple example for execution in Jenkins CI/CD
Example 1
- Open the site qaautomationlabs.com/
- Verify the title of the page
- After opening the site click on the Menu “Blogs”

Example 2
- Open the site qaautomationlabs.com/
- After opening the site click on the Menu “Blogs”
- Enter some text in the search box
- Click on the Search button

Code :
// @ts-check
const { test, expect } = require(“@playwright/test”);
test(“Open the site ‘qaautomationlabs.com ‘and verify the title and Click on Menu Blogs”, async ({
page,
}) => {
await page.goto(“https://qaautomationlabs.com/”);
await expect(page).toHaveTitle(/About Us — QAAutomationLabs/);
const blogs = page.locator(“//span[text()=’Blogs’]”);
await blogs.last().click();
});
test(“Search the Blog with text ‘Playwright “, async ({ page }) => {
await page.goto(“https://qaautomationlabs.com/”);
const blogs = page.locator(“//span[text()=’Blogs’]”);
const search = page.locator(“id=wp-block-search__input-2”);
const searchIcon = page.locator(“id=search-icon”);
await blogs.last().click();
await search.type(“Playwright”);
await searchIcon.click();
});
Step 3: Install Jenkin in mac
To run the playwright test case in Jenkin’s first step to install Jenkins, below are the steps for Jenkin installation.
Step 1 :
Step 1.1: Install Homebrew
If you don’t already have the Homebrew package manager installed, you will first need to follow the installation steps from https://brew.sh/
You can check if Homebrew is already installed by opening a terminal by typing
brew — version
Step 1.2: Install Jenkins
Once Homebrew is installed, you can run the following command which will download and install the current Long-term support (LTS) version of Jenkins.
brew install Jenkins-lts.
Step 1.3: Start the Jenkins server
The next step is to actually start the Jenkins server. You can do that with this command:
brew services start Jenkins-lts
This will start the Jenkins server in a few seconds. You can check if it is properly working by visiting http://localhost:8080/
Step 1.4: Get the installation password
To get the password needed to run the installation process, just check the content of the file mentioned on the screen.

Step: 2
Configure Jenkin
Once you have installed Jenkins in any of the ways presented, it is time to do the final setup.
Step 2.1: Install plugins
Jenkins is composed of multiple components called plugins. The next step asks you which plugins you would like to install. Just install the suggested plugins. Don’t worry about this — you can easily add or remove plugins later. Just install the suggested plugins.

Step 2.2: Create a Jenkins User
The next step is to create a Jenkins admin user. Make sure you write down the username and password as you will need them later.

Step 2.3: Configure the Jenkins URL
The final step is to configure the URL for the Jenkins server. This would be prefilled for you. So all you need to do is to click “Save and continue“.

Soon the server will be configured and it’s ready for action.

Step 3
Source Code Management setting in Jenkin
Step 3.1: Install node from Global tool configuration

Step 3.2 Provide repository URL, credential, and branch name of the git repository under source code management

Step 4: Set up the package.json
Set up the package.json for test case execution in Jenkins . In the below screenshot we are running the test case in the chromium browser only.

Code:
{
“name”: “playwright_with_javascripts”,
“version”: “1.0.0”,
“description”: “”,
“main”: “index.js”,
“scripts”: {
“testCase”: “npx playwright test — project=chromium”,
},
“keywords”: [],
“author”: “”,
“license”: “ISC”,
“devDependencies”: {
“@playwright/test”: “¹.25.2”
}
}
Step 5: Set up Build in Jenkin to run the test case
In Jenkin Under Configure ->Build enter the below command. The first command Installs the dependencies and the Second command will run test cases in chromium browser only.


Run Build
Once we entered two commands next step is to run the Build


In Below, screens shot we can see playwright test cases are executing in chromium browser.
Both test cases are executed successfully!

