Problem Statement
We need to integrate the Cucumber report in CI/CD Jenkins for to execute the Cypress test cases So that we can see the results of the cucumber cypress test case in graphical form (pie chat etc.) In Jenkins itself.
What is Cucumber
Cucumber reads executable specifications written in plain text and validates that the software does what those specifications say. The specifications consist of multiple examples or scenarios. For example:
Scenario: Breaker guesses a word
Given the Maker has chosen a word
When the Breaker makes a guess
Then the Maker is asked to score
Each scenario is a list of steps for Cucumber to work through. Cucumber verifies that the software conforms with the specification and generates a report indicating success or failure for each scenario.
What is BDD?
BDD bridges the gap between business stakeholders and the technical team through a common platform. Hence, communication among the team becomes more transparent.
Gherkin is being used as the language in which the test cases are written in a simple format and can also be read and modified by a non-technical user.
Steps to Integrate Cucumber in Jenkin CI/CD
Step 1:
Create a folder and Generate package.json
- Create a new folder, I called mine project cypress_with_cucumber
- Type npm init (package.json) is created
Step 2:
Install cypress
To install Cypress in the root of the project folder run command, run the command: npm install cypress –save-dev
Step 3:
Install two plugins “cypress-cucumber-preprocessor” and “multiple-cucumber-html-reporter,”
Run > npm install — save-dev cypress-cucumber-preprocessor
Run > npm install multiple-cucumber-html-reporter
Step 4:
Add below line under plugins -> index.js
/// <reference types=”cypress” />
const cucumber = require(“cypress-cucumber-preprocessor”).default;
module.exports = (on, config) => {
on(“file:preprocessor”, cucumber());
};
Step 5:
Package.json looks like see below
{
“name”: “cypress_cucumber_jenkin”,
“version”: “1.0.0”,
“description”: “”,
“main”: “index.js”,
“scripts”: {
“run:non-headless”: “cypress open”,
“run:headless”: “cypress run”
},
“author”: “”,
“license”: “ISC”,
“devDependencies”: {
“cypress”: “^9.7.0”,
“cypress-cucumber-preprocessor”: “^4.3.1”,
“multiple-cucumber-html-reporter”: “^1.21.4”
},
“cypress-cucumber-preprocessor”: {
“cucumberJson”: {
“generate”: true,
“outputFolder”: “cypress/cucumber-json”,
“filePrefix”: “”,
“fileSuffix”: “.cucumber”
},
“nonGlobalStepDefinitions”: true
}
}
Detail of pacakage.json fields

Step 6:
Add the below line in cypress.json
{
“testFiles”: “**/*.feature”
}
Step 7:
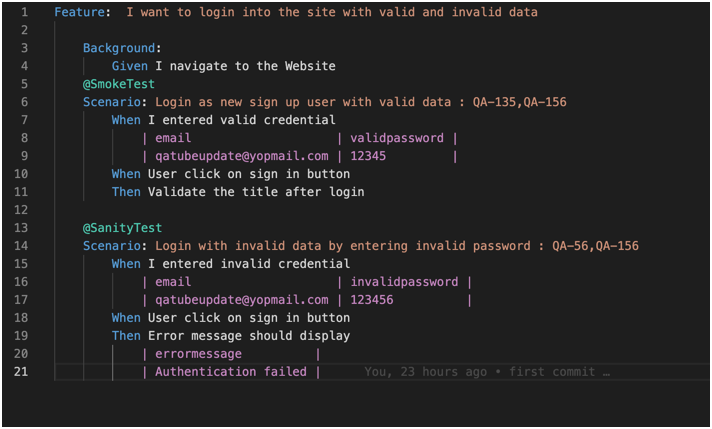
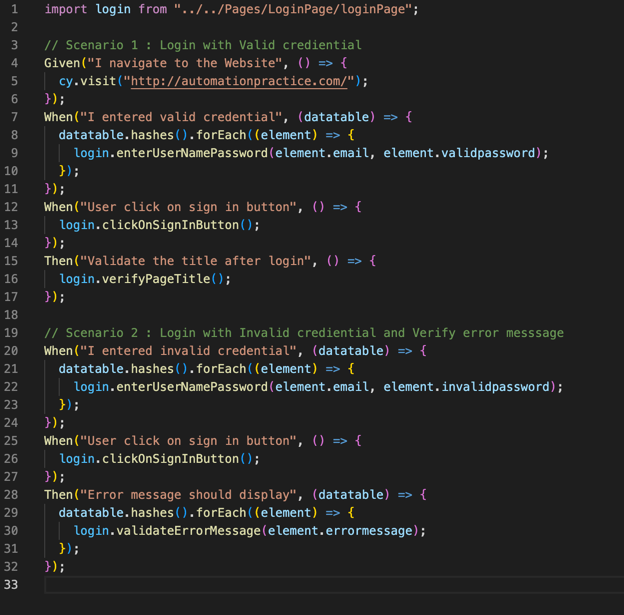
Create feature and .spec file
How to create feature and .spec please follow the links
Feature files look like given below
.spec files look like given below
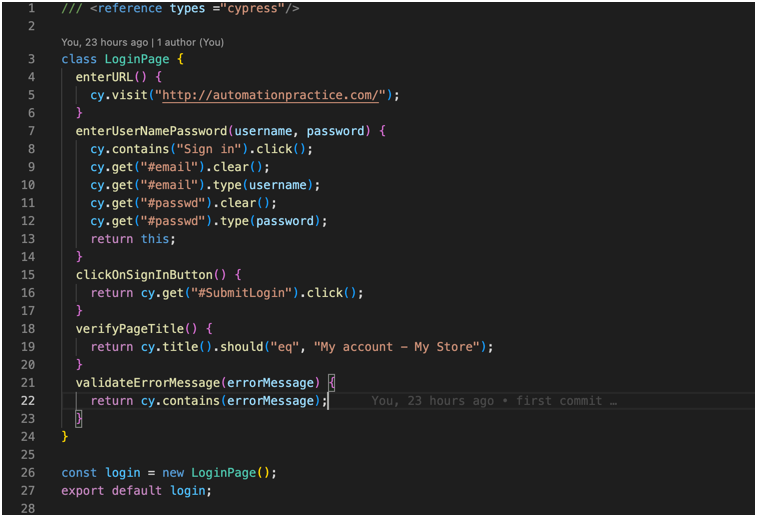
Test Class
Set Up Jenkins
Step 1 Install Jenkin in mac
To run the cypress test case in Jenkin’s first step to installing Jenkins, below are the steps for Jenkin installation.
Step 1.1: Install Homebrew
If you don’t already have the Homebrew package manager installed, you will first need to follow the installation steps from https://brew.sh/
You can check if Homebrew is already installed by opening a terminal by typing
brew –version
Step 1.2: Install Jenkins
Once Homebrew is installed, you can run the following command which will download and install the current Long-term support (LTS) version of Jenkins.
brew install Jenkins-lts.
Step 1.3: Start the Jenkins server
The next step is actually to start the Jenkins server. You can do that with this command:
brew services start Jenkins-lts
This will start the Jenkins server in a few seconds. You can check if it is properly working by visiting http://localhost:8080/
Step 1.4: Get the installation password
To get the password needed to run the installation process, just check the content of the file mentioned on the screen.

Step: 2 Configure Jenkin
Once you have installed Jenkins in any of the ways presented, it is time to do the final setup.
Step 2.1: Install plugins
Jenkins is composed of multiple components called plugins. The next step asks you which plugins you would like to install. Just install the suggested plugins. Don’t worry about this — you can easily add or remove plugins later. Just install the recommended plugins.
Step 2.2: Create a Jenkins User
The next step is to create a Jenkins admin user. Make sure you write down the username and password as you will need them later.

Step 2.3: Configure the Jenkins URL
The final step is to configure the URL for the Jenkins server. This would be prefilled for you. So all you need to do is to click “Save and continue“.

Soon the server will be configured and it’s ready for action.
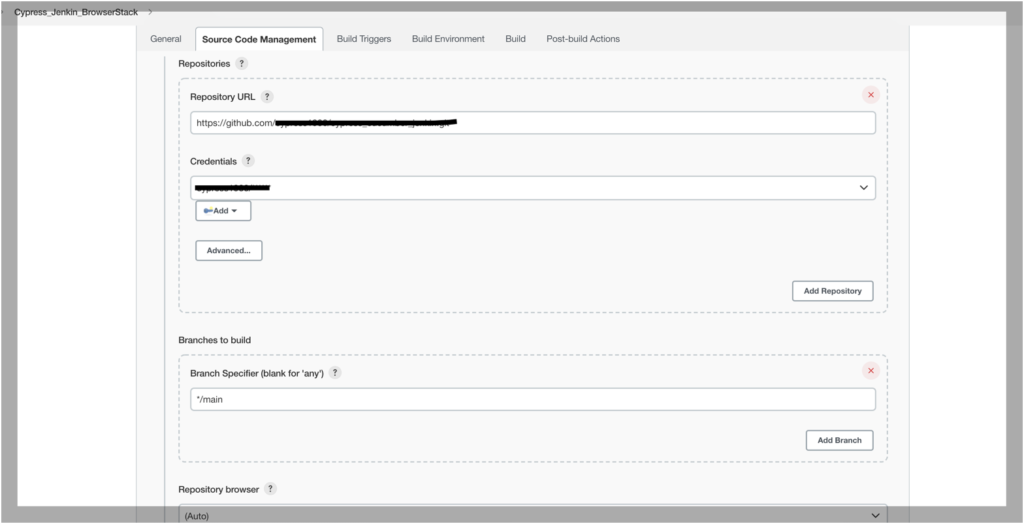
Step 3: Source Code Management setting in Jenkin
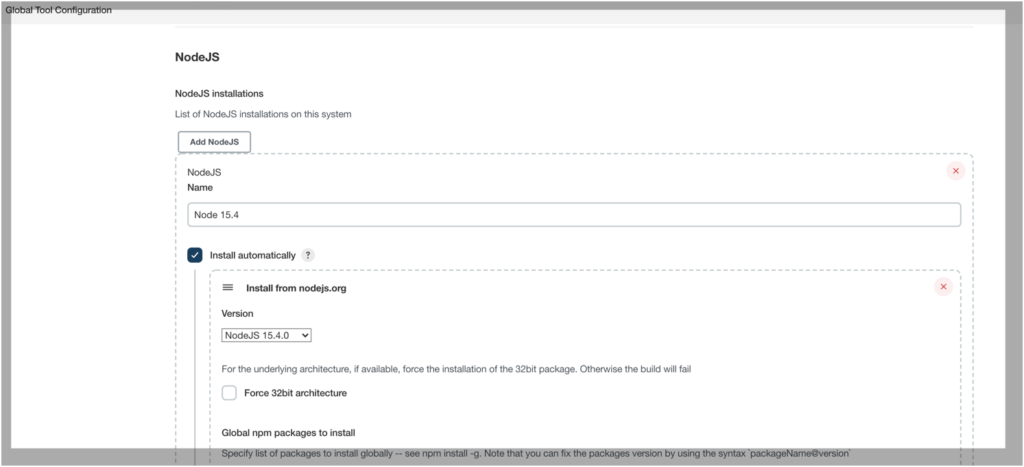
Step 3.1: Install node from Global tool configuration
Step 3.2: Provide repository URL, credential, and branch name of the git repository under source code management
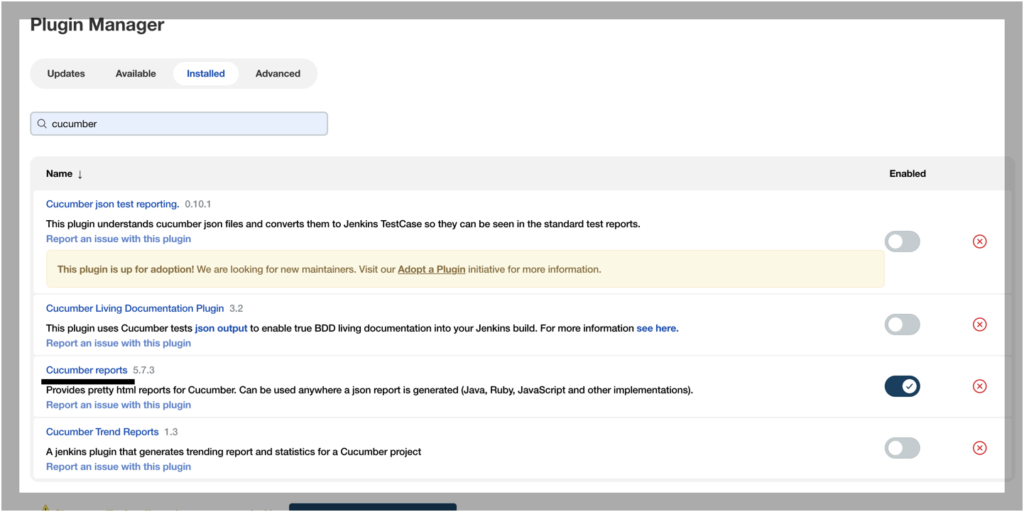
Step 3.3: Install the Cucumber report by selecting the plugin
Click on Manage Jenkin -> Manage Plugin and Search for “Cucumber”. In the below screenshot we can see Cucumber report is already installed
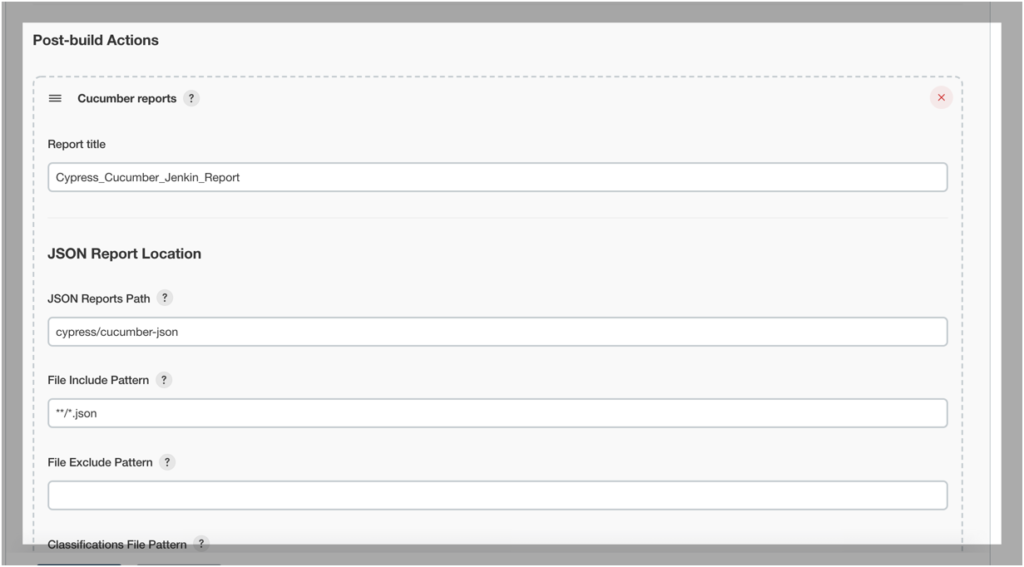
Step 3.4
In Post Build set up JSON path as shown below and finally click on save/or apply
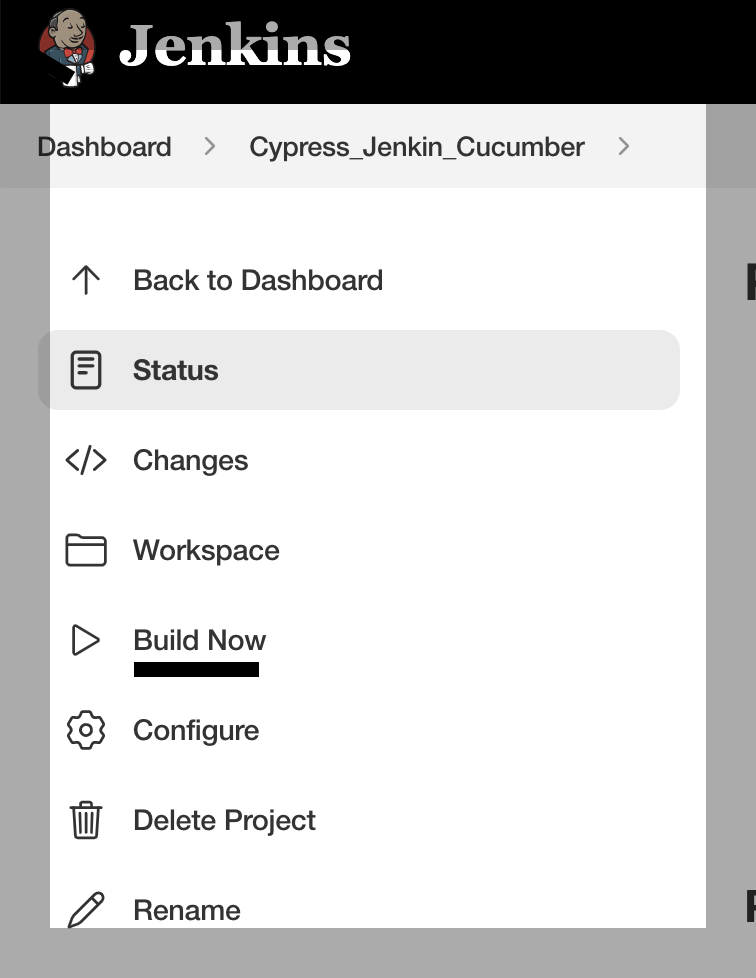
Set Up Build Steps in Jenkins
1. Click on Build and — > Select Execute Shell and add the below lines under the command and Click on Save or apply
npm install /* This command installs all devDependencies */
npm install cypress
npm run run:headless /* This command will run the test case in headless mode*/
node cucumber-html-report.js /* This command uses the generated .json from the above step and finally generates the cucumber report */

3. Click on Console Output, we can see the build start running
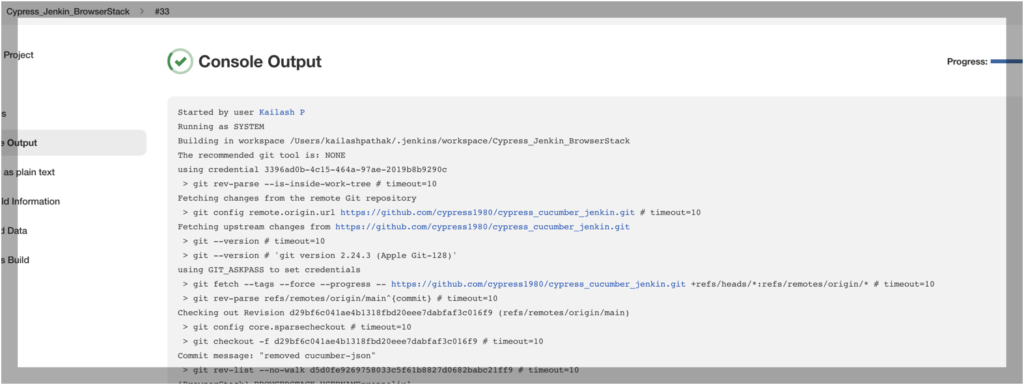
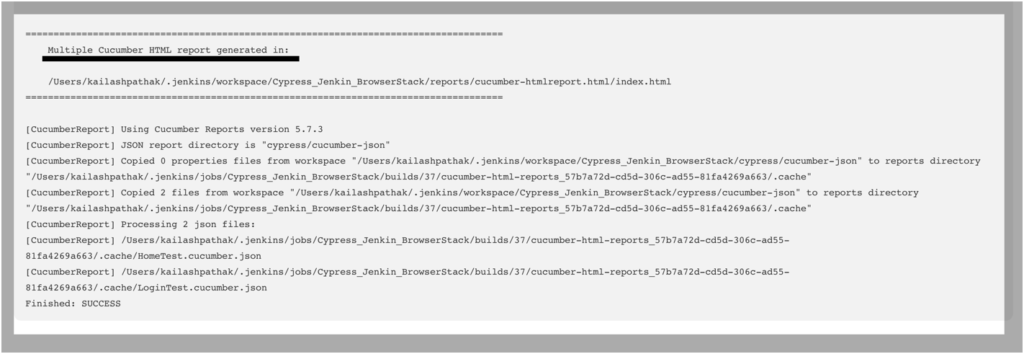
4. Once Build runs successfully we can see Cucumber report is generated
Verify the Cucumber report in Jenkins Dashboard
Cucumber report is generated and displayed on the Jenkins dashboard
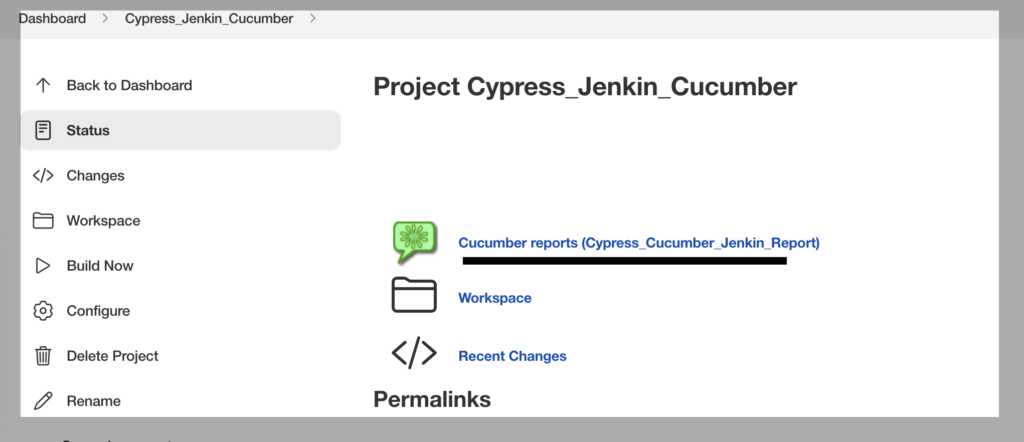
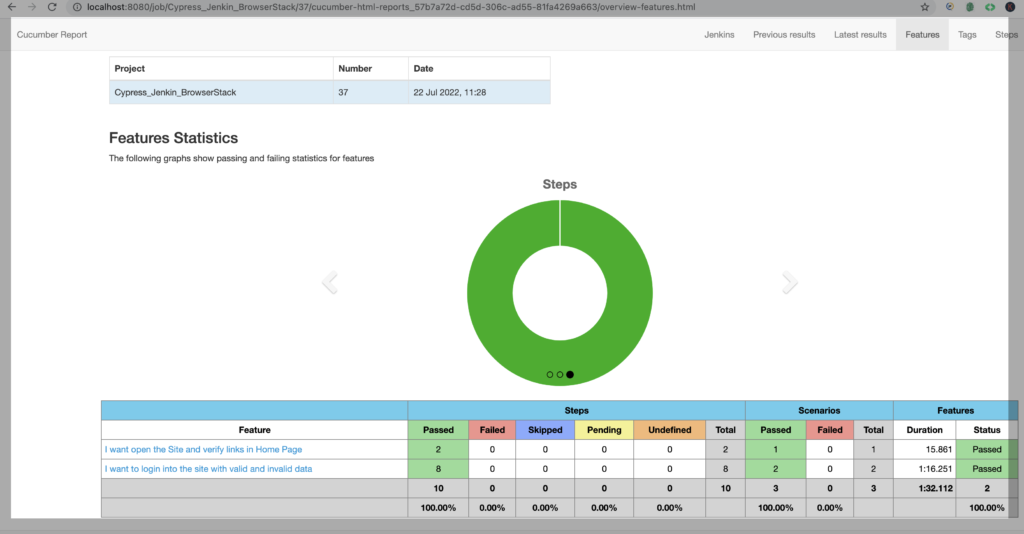
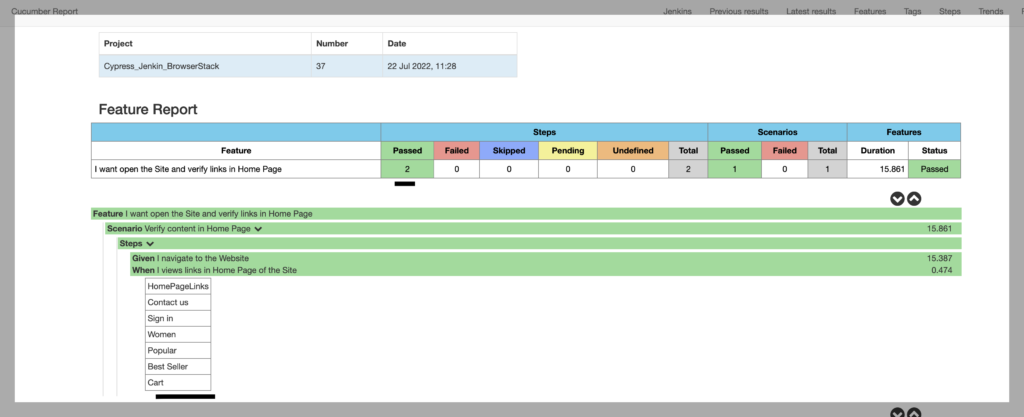
Click on the Cucumber report from the dashboard. We can see a pie chart with detail of each .feature
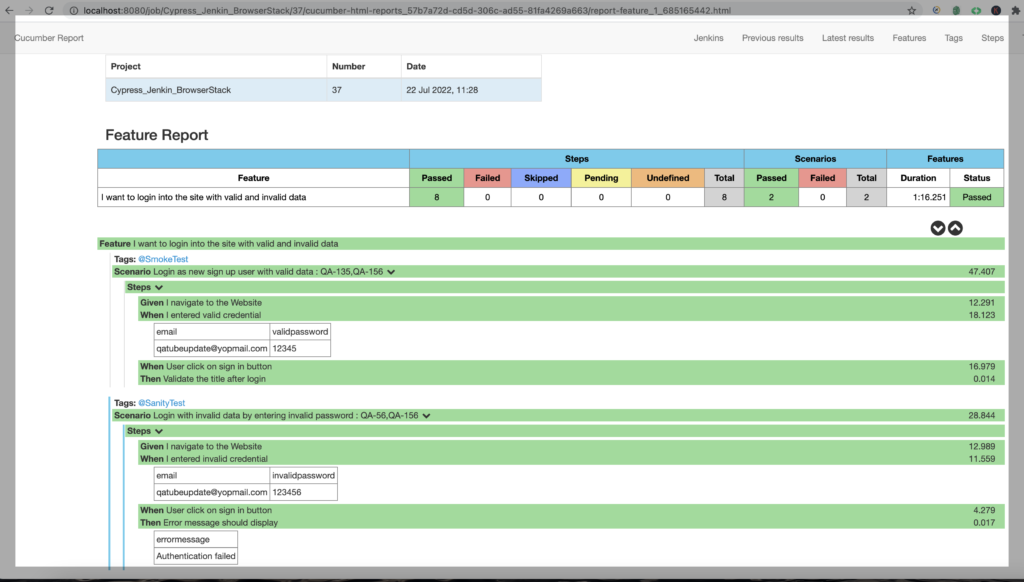
Passed Test cases Report
In below screenshot, we can see Passed Steps, Scenarios, and Features
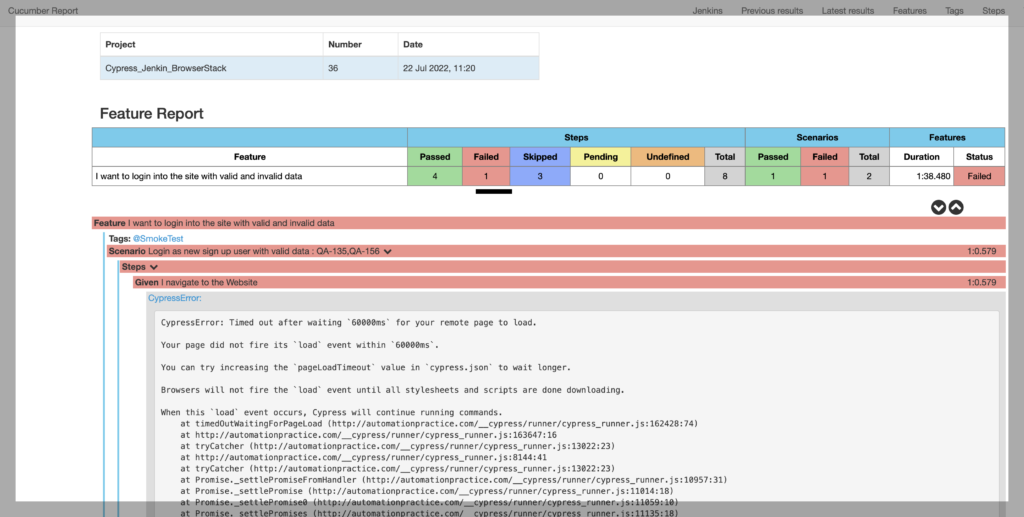
Failed Test cases Report
In the below report, we can see one of the test cases is failing
Conclusion
Cucumber and Cypress with CI/CD Jenkins pipelines have proven to be a robust and sustainable pair. You can write feature files containing Cucumber scenarios and then use Cypress to write your step definitions in your spec files. A special preprocessor then converts the scenarios and step definitions into “regular” JavaScript Cypress tests.